Welcome to Geekazine!The GIMP (Gnu Image Manipulation Program) is the flagship of Linux and open source photo editing programs. (A windows version, which I have used, though not recently, is available at Sourceforge.) The GIMP is free and open source; there is no charge for installing and using it.
The GIMP is a powerful, complex program which I’ve heard compares well with Photoshop. I cannot speak to this, since I have not used Photoshop, but I have used Paintshop Pro extensively on assignment, and the GIMP is easily equal to it.
The GIMP, though, is not easy to figure out.
I don’t believe that there really is any such thing as an “intuitive” interface for a program, in the sense of “easy to figure out at first glance.” “Intuitive” means “easy to remember.” The GIMP offers so many options that it is neither easy to figure out nor easy to remember without help. So I thought I’d share some of my experiences.
Most of what I do with the GIMP is prepare pictures for posting on the web. Although I’m little more than an intermediate level amateur, I’ve learned a few tricks which enable me to fool my friends and family into thinking that I know what I’m doing.
So here are the steps I normally follow to edit a picture, without getting involved in layers and other stuff I haven’t yet mastered.
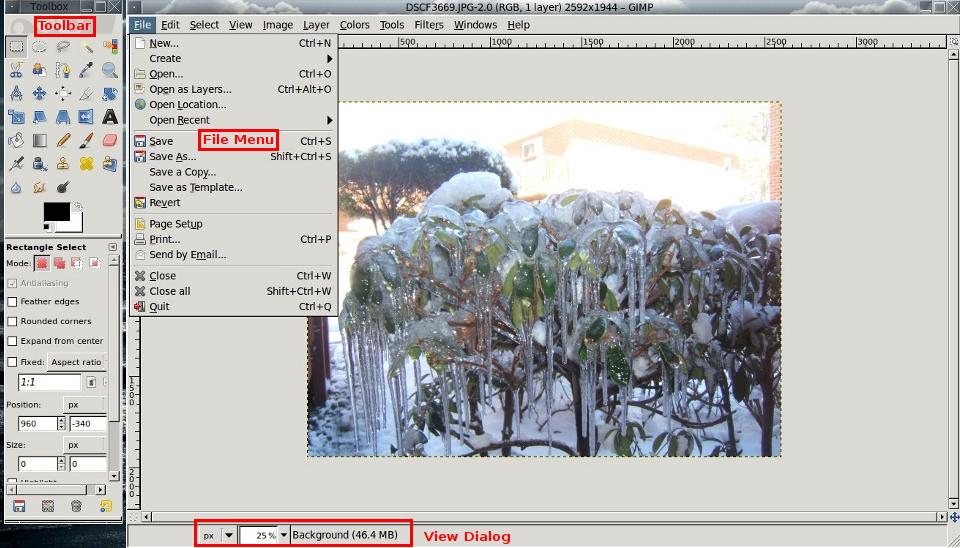
The basic GIMP interface includes two windows: the image window and the toolbar. Every item on the toolbar may also be accessed from the menu bar at the top of the image window. (The most significant planned improvement for the GIMP is to integrate the tool bar into the image window.) Click for a larger image.
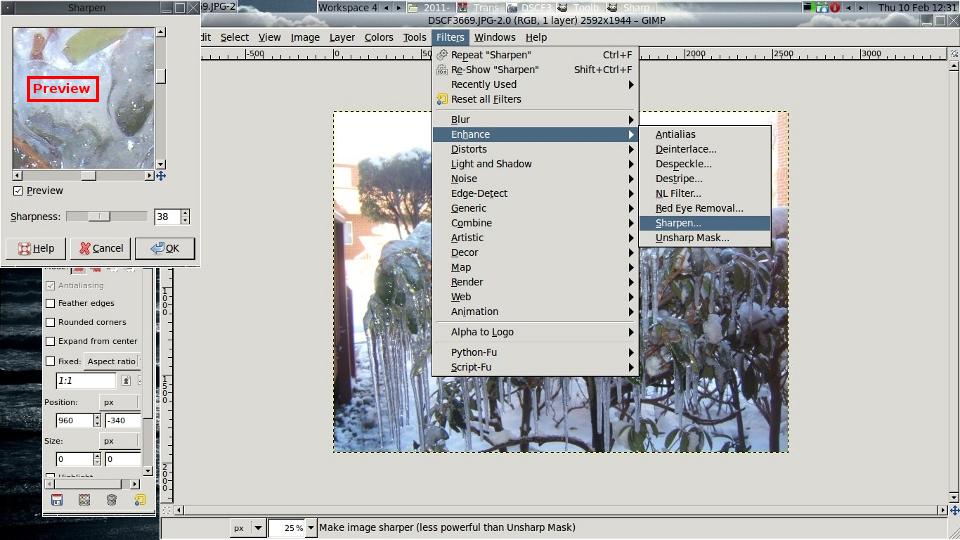
My first step is normally to sharpen the image. Go to Filters–>Enhance–>Sharpen to start the Sharpen Tool. The illustration shows both the Sharpen dialog and the menu selection. Click for a larger image.
In the preview pane, use the sliders below and to the right of the preview window to navigate to different parts of the image. I normally move to the area with the greatest detail and contrast; for example, if there is a flower in the picture, I’ll navigate to the flower. Then use the “Sharpness” slider to select the degree of sharpness; the changes will be reflected in the preview window. Clicking “OK” makes the change, but, if you are dissatisfied, you can click Edit–>Undo or hit CTRL-z and to revert and try again.
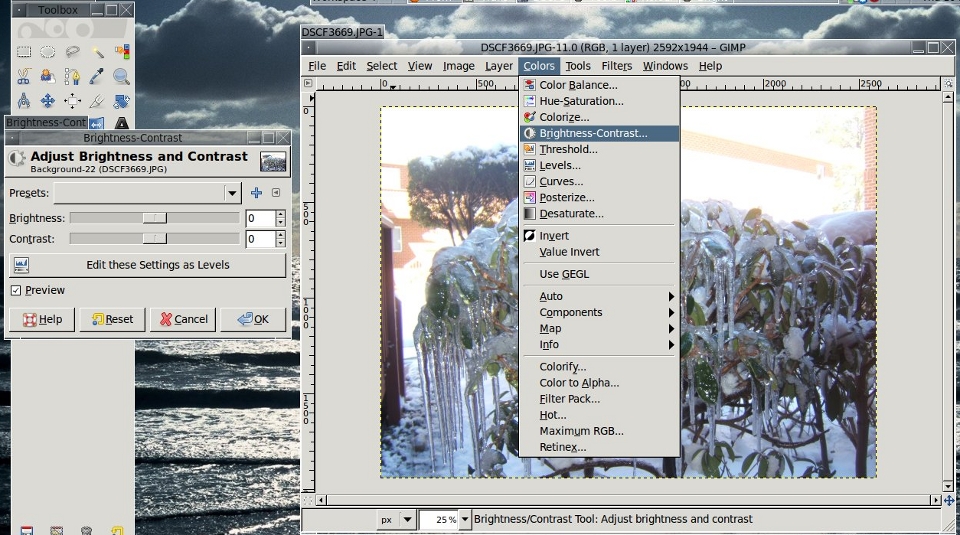
Next, I tinker with the brightness and contrast. Until recently, I’ve used the Brightness and Contrast Tool (accessed at either Colors–>Brightness-Contrast or at Tools–>Color Tools–>Brightness-Contrast) to do this, as shown below. Once again, the illustration shows both the menu and the tool. Click for a larger image.
Changes made using the sliders are reflected immediately in the main image window.
Recently, I’ve been experimenting with color curves. I don’t really understand what they are, but you can access the Curves tool at Colors–>Curves or Tools–>Color Tools–>Curves. The illustration shows a curve with only one manipulation point, but you can bend them at two or more points if you wish. Changes are reflected immediately in the main image window. Click for a larger image.
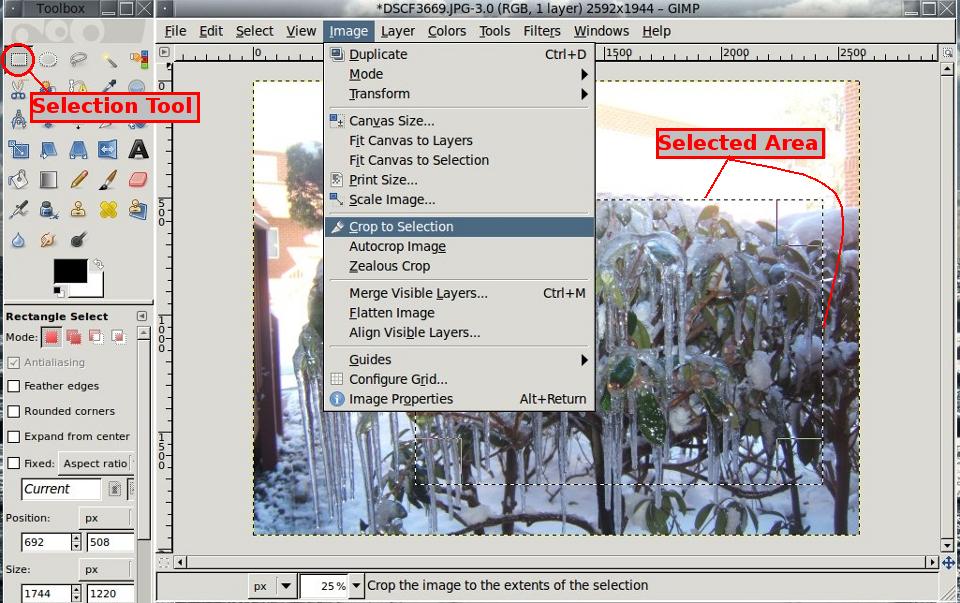
Frequently, I crop pictures to exclude extraneous material. Use the Selection Tool to outline the area to keep, then go to Image–>Crop to Selection. If dissatisfied, use the Undo commands to revert to the previous image. Click for a larger image.
My last step is to scale or resize the image. I see no need to upload an umpty-ump mega-pixel image at 2400 by 1900 pixels for display in an environment optimized for less than half of that. It increases page load times, adds overhead, and provides little or no benefit for someone who is not a professional photographer trying to attract customers or make sales.
In this post, I scaled the original images to a width of 960 pixels and set them to display at a width of 500 pixels, so that the reader could click on them and see the detail more clearly; I did not use thumbnails, because thumbnails would be so small as to look silly.
Normally, I scale to as close to the desired display size as I can get.
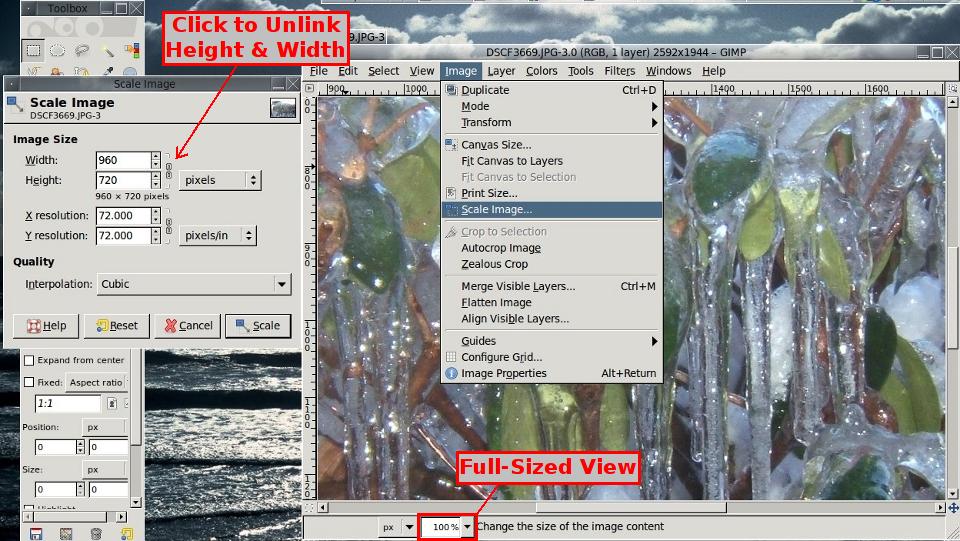
In the GIMP, the scale tool is accessed at Image–>Scale Image. In this illustration, I’ve also increased the view of the original picture from 25% to 100%. Click for a larger image.
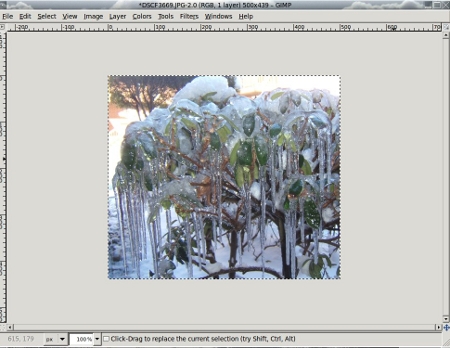
And here is the image with the view still at 100% after scaling (the illustration below was scaled to 450 pixels wide).
I ended up not using this version of the picture. You can see my final effort.
Notes and Hints:
Once you save a normal image file with changes, undo information is lost. Saving images in the native GIMP format (*.xcf) preserves undo information. I normally “Save As” and preserve the source image.
You can do fancy stuff with layers in the GIMP. I don’t understand them yet.
Meet the Gimp offers excellent video tutorials for download. There’s a detailed table of contents if you are interested in a specific topic. The library contains over 150 tutorials and is still growing.
Share0share0shareNew
This entry was posted by Frank on Thursday, February 10th, 2011 at 3:36 pm and is filed under Frank Bell . You can follow any responses to this entry through the RSS 2.0 feed. Both comments and pings are currently closed.

Thanks, Jeff!